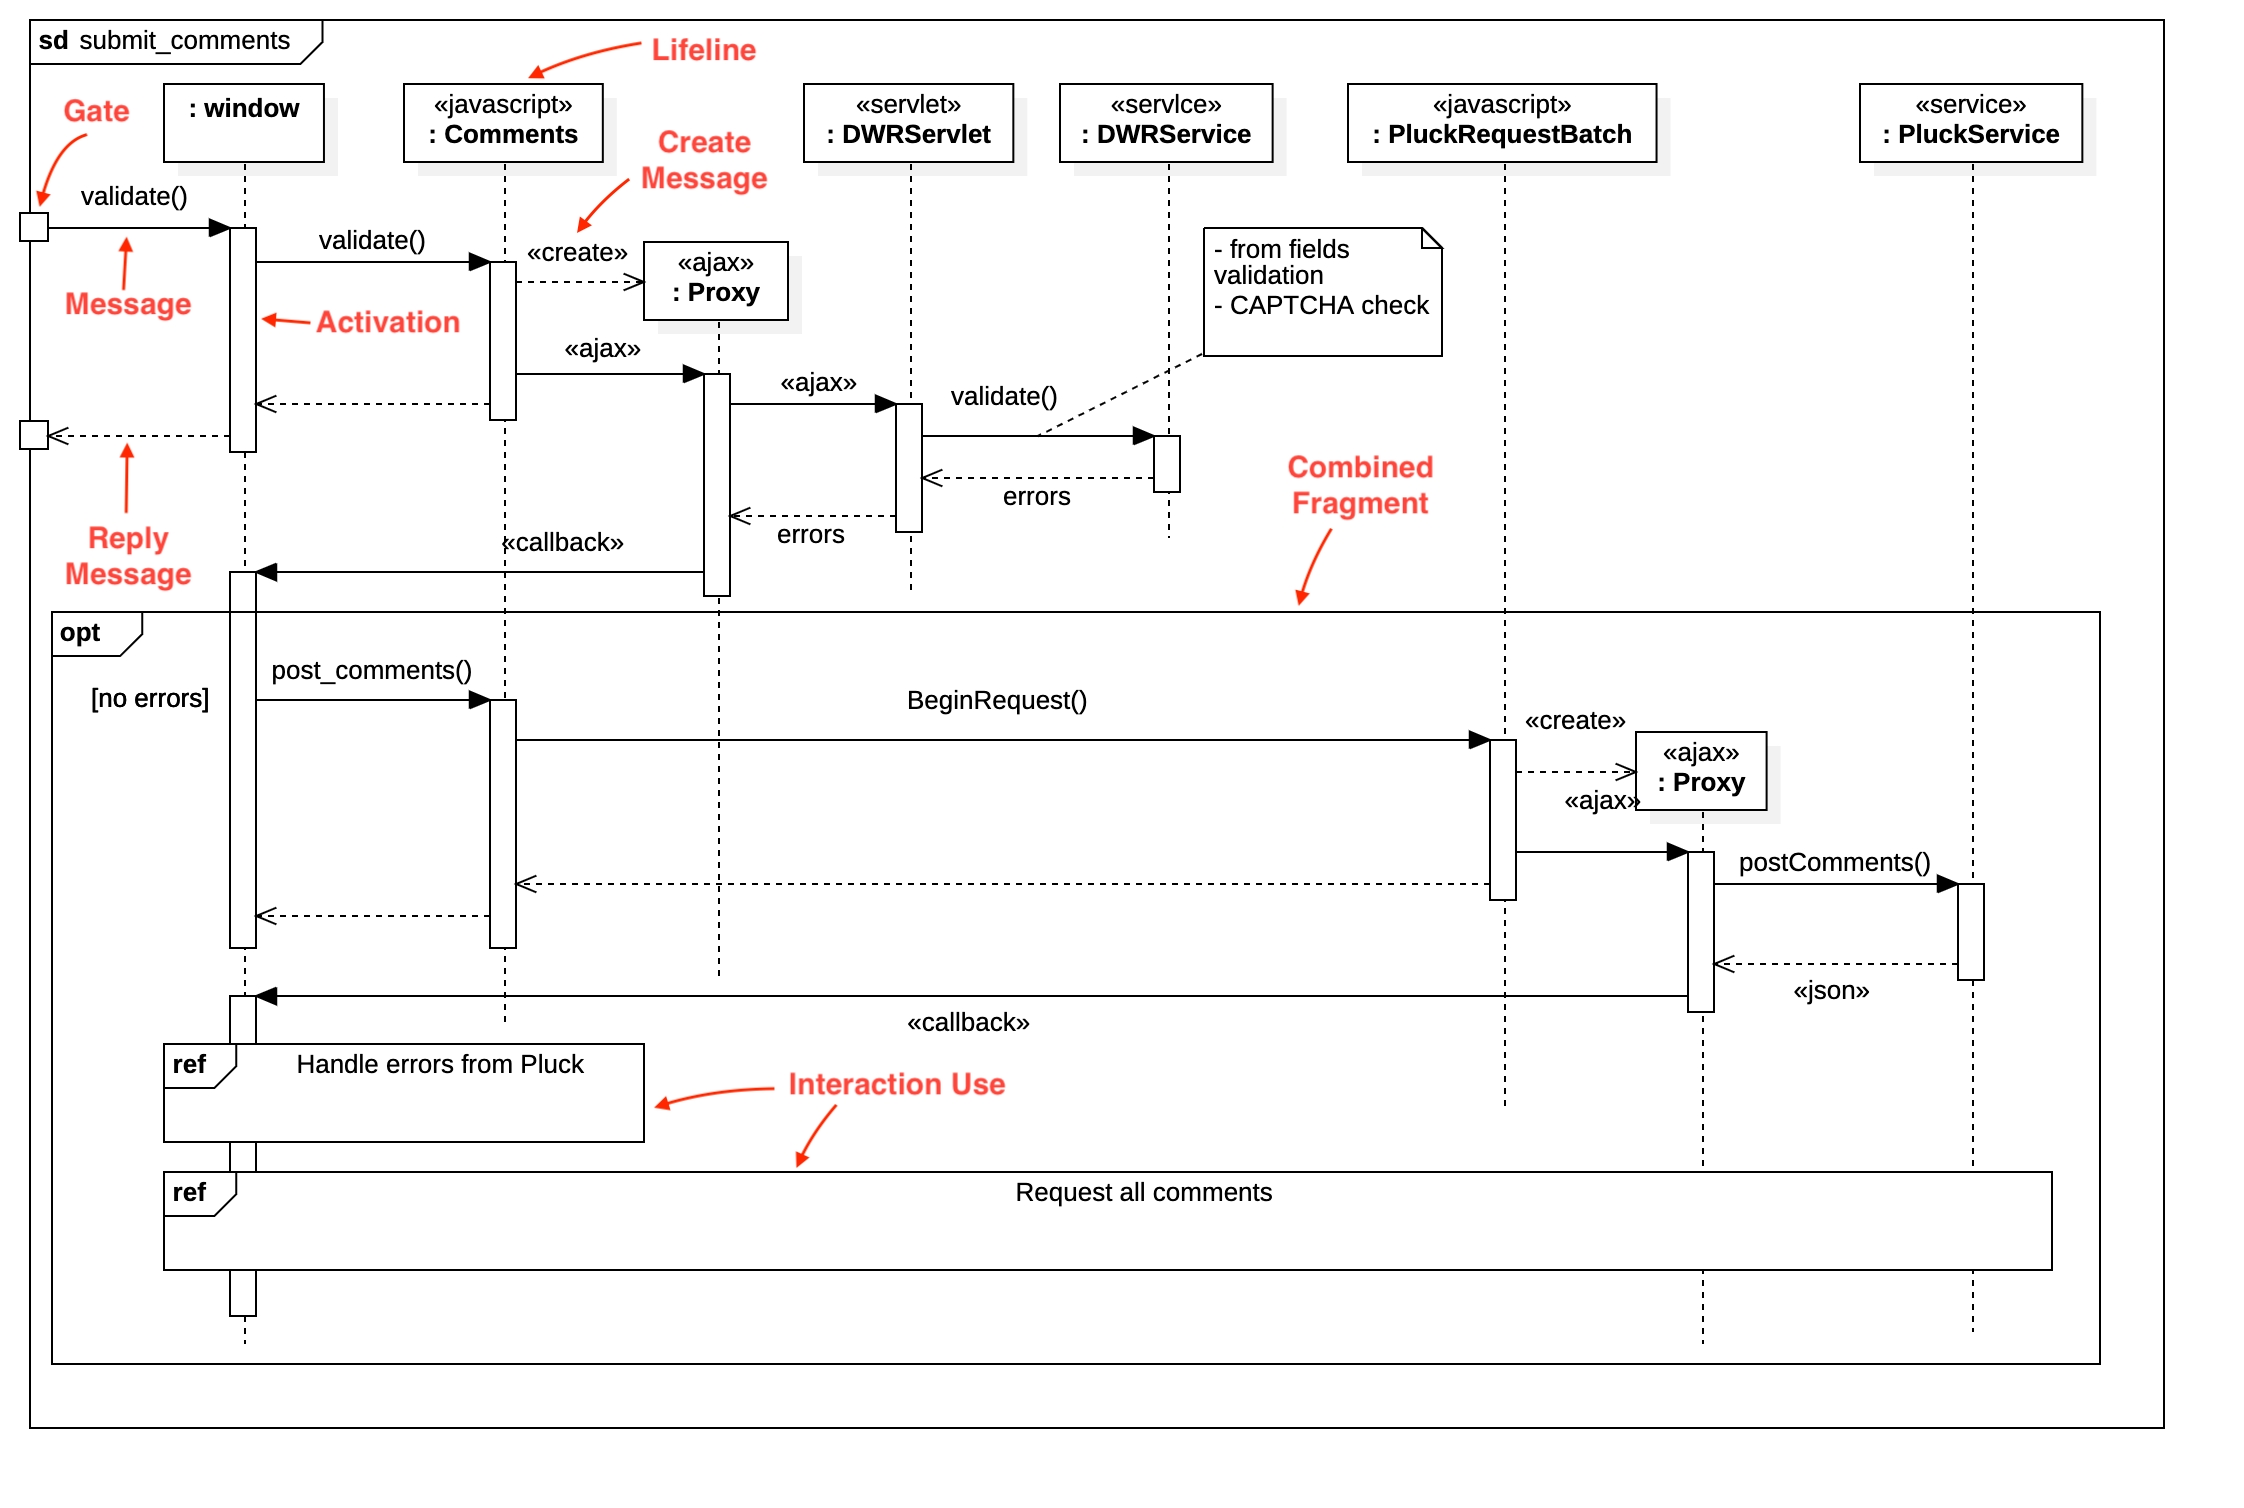
Sequence Diagram

Create Sequence Diagram
To create a Sequence Diagram:
Select first an element where a new Sequence Diagram to be contained as a child.
Select Model | Add Diagram | Sequence Diagram in Menu Bar or select Add Diagram | Sequence Diagram in Context Menu.
See also
UML Sequence Diagram - For more information about UML Sequence Diagram.
You can show or hide sequence numbers of messages. To show or hide sequence numbers of message:
Check or Uncheck
showSequenceNumberproperty of Sequence Diagram or Communication Diagram.
Lifeline
To create a Lifeline:
Select Lifeline in Toolbox.
Drag on the diagram as the size of Lifeline.
To create a Lifeline from a Classifier (Class, Interface, etc.) by Drag-and-Drop:
Drag a Classifier from Explorer.
Drop on the diagram.
You can use QuickEdit for Lifeline by double-click or press Enter on a selected Lifeline.
Lifeline Expression : Edit lifeline expression.
Syntax of Lifeline Expression
Visibility : Change visibility property.
Add Note : Add a linked note.
Add Constraint : Add a constraint.
Select Type : Select a type of the lifeline.
Create Type : Create a Class as a type of the lifeline.
Add Message with Lifeline : Add a message with a lifeline.
Add Create Message with Lifeline : Add a create message with a lifeline.
Add Self Message : Add a self message.
Add Found Message : Add a found message.
Add Lost Message : Add a lost message.
Add Message from Gate : Add a message from a gate.
Add Message to Gate : Add a message to a gate.
Message
To create a Message (or Self Message):
Select Message (or Self Message) in Toolbox.
Drag from a Lifeline and drop on another Lifeline. (Just click on a Lifeline if you want to create a self message.)
You can change the kind of message by setting messageSort property in Property Editor:
synchCall: Synchronous CallasynchCall: Asynchronous CallasynchSignal: Asynchronous SignalcreateMessage: Create MessagedeleteMessage: Delete Messagereply: Reply Message
You can use custom sequence numbers instead of auto-generated integer sequence numbers.
Enter sequence number for each Message's
sequenceNumberproperty.Change
sequenceNumberingproperty of Sequence Diagram or Communication Diagram tocustom.
You can use QuickEdit for Message by double-click or press Enter on a selected Message.
Message Expression : Edit message expression.
Syntax of Message Expression
Visibility : Change visibility property.
Add Note : Add a linked note.
Add Constraint : Add a constraint.
Select Operation : Select an operation as a signature of the message.
Create Operation : Create an operation as a signature of the message.
Select Signal : Select a signal as a signature of the message.
Create Signal : Create a signal as a signature of the message.
Add Reply Message : Add a reply message.
Endpoint
To create an Endpoint:
Select Endpoint in Toolbox.
Click at the position on the diagram.
Gate
To create a Gate:
Select Gate in Toolbox.
Click at the position on the diagram.
State Invariant
To create a State Invariant:
Select State Invariant in Toolbox.
Click on a Lifeline where the State Invariant to be attached.
You can use QuickEdit for State Invariant by double-click or press Enter on a selected State Invariant.
Invariant : Edit invariant property.
Continuation
To create a Continuation:
Select Continuation in Toolbox.
Drag on the diagram as the size of Continuation.
You can use QuickEdit for Model Element (See Model Element).
Combined Fragment
To create a Combined Fragment:
Select Combined Fragment in Toolbox.
Drag on the diagram as the size of Combined Fragment.
You can change the operator by setting interactionOperator property in Property Editor:
alt: alternativesopt: optionpar: parallelloop: iterationcritical: critical regionneg: negativeassert: assertionstrict: strict sequencingseq: weak sequencingignore: ignoreconsider: considerbreak: break
You can use QuickEdit for Combined Fragment by double-click or press Enter on a selected Combined Fragment.
Name Expression : Edit name expression.
Syntax of Name Expression
Add Operand : Add an interaction operand.
Interaction Operand
You can use QuickEdit for Interaction Operand by double-click or press Enter on a selected Interaction Operand.
Guard : Edit guard property.
Interaction Use
To create a Interaction Use:
Select Interaction Use in Toolbox.
Drag on the diagram as the size of Interaction Use.