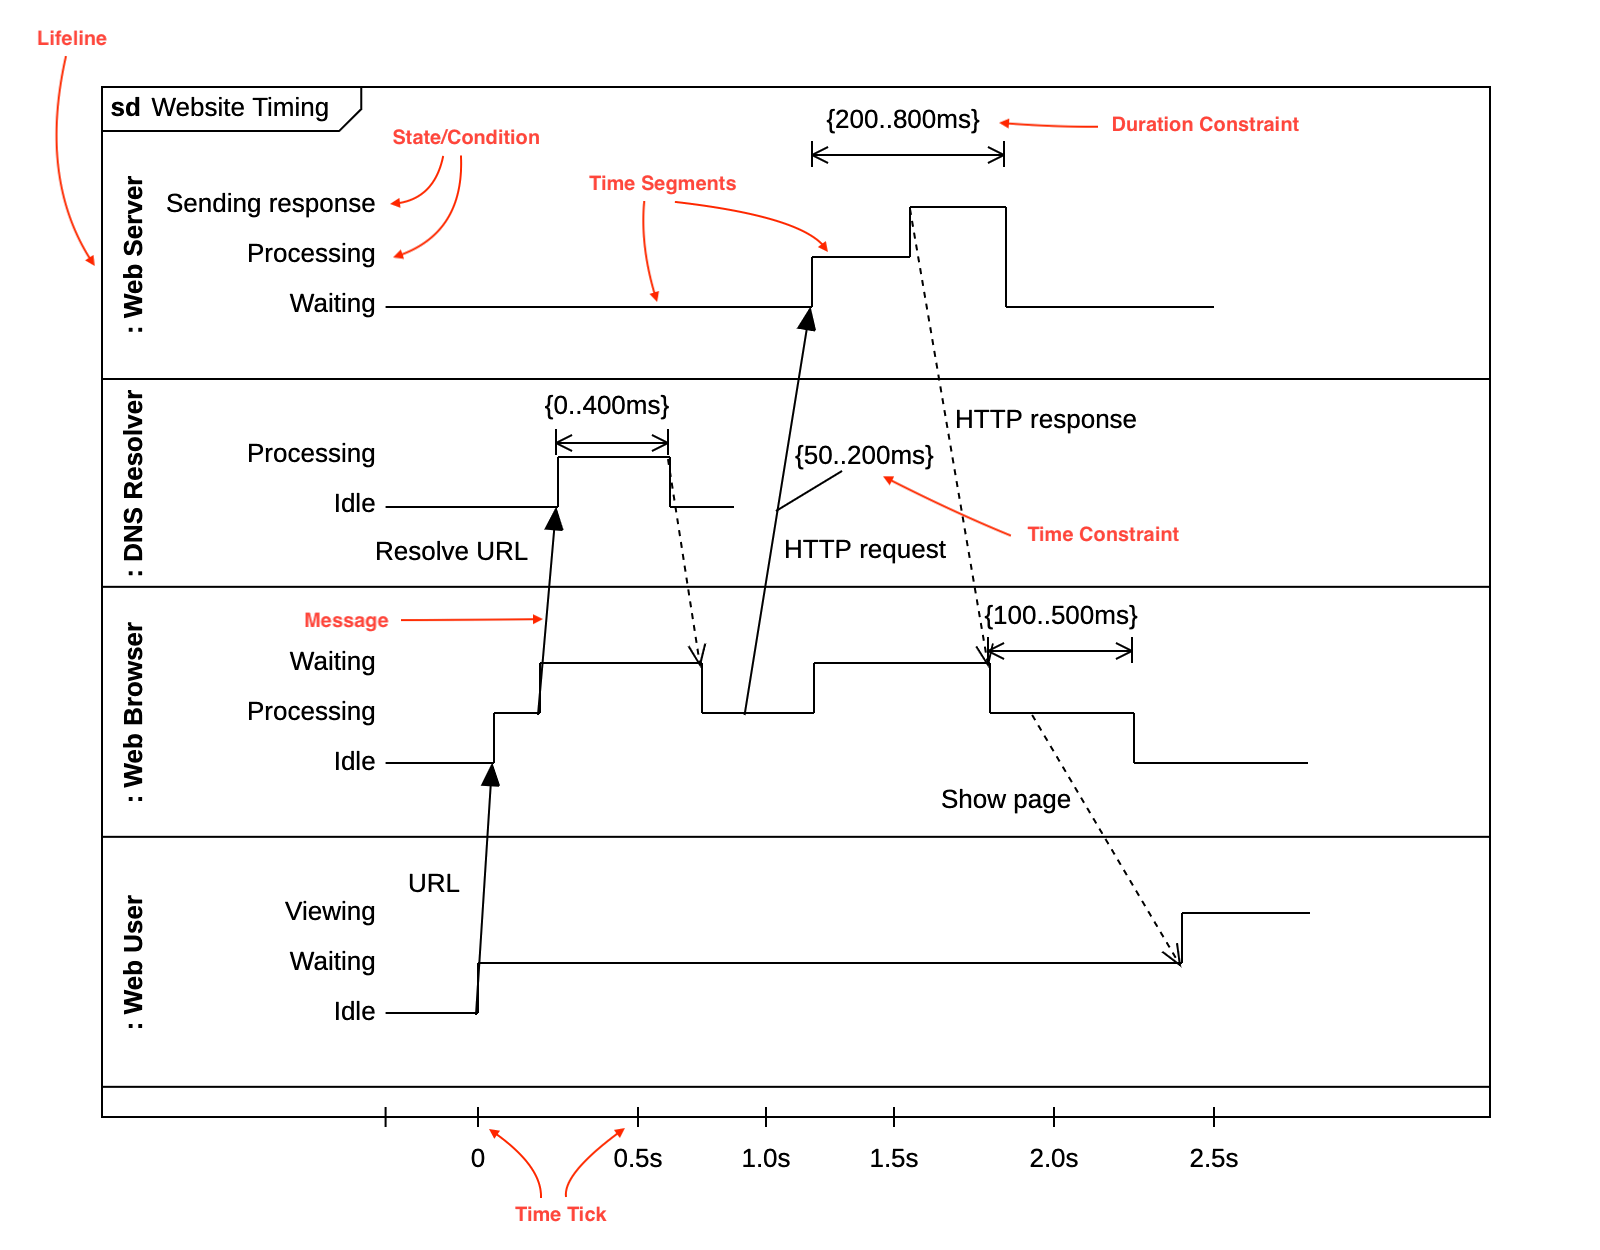
Timing Diagram

Create Timing Diagram
To create a Timing Diagram:
Select first an element where a new Timing Diagram to be contained as a child.
Select Model | Add Diagram | Timing Diagram in Menu Bar or select Add Diagram | Timing Diagram in Context Menu.
See also
UML Timing Diagram - For more information about UML Timing Diagram.
Lifeline
To create a Lifeline:
Select Lifeline in Toolbox.
Drag on the diagram as the size of Lifeline.
To create a Lifeline from a Classifier (Class, Interface, etc.) by Drag-and-Drop:
Drag a Classifier from Explorer.
Drop on the diagram.
You can use QuickEdit for Lifeline by double-click or press Enter on a selected Lifeline.
Lifeline Expression : Edit lifeline expression.
Visibility : Change visibility property.
Select Type : Select a type of the lifeline.
Create Type : Create a Class as a type of the lifeline.
Create State/Condition : Create a State/Condition on the lifeline.
State/Condition
To create a State/Condition:
Select State/Condition in Toolbox.
Click on a Lifeline on the diagram.
You can use QuickEdit for State/Condition by double-click or press Enter on a selected State/Condition.
Name Expression : Edit state/condition name.
Visibility : Change visibility property.
Create Time Segment : Create a Time Segment on the State/Condition.
Time Segment
To create a Time Segment
Select Time Segment in Toolbox.
Click on a State/Condition area on the diagram.
Time Tick
To create a Time Tick
Select Time Tick in Toolbox.
Click on the Timing Diagram Frame area on the diagram.
Time Constraint
To create a Time Constraint
Select Time Constraint in Toolbox.
Click on an element (e.g. Message or Time Segment) to attach a time constraint on the diagram.
Duration Constraint
To create a Duration Constraint
Select Duration Constraint in Toolbox.
Drag on the diagram as the size of Duration Constraint.
Message
To create a Message:
Select Message in Toolbox.
Drag from a Time Segment and drop on another Time Segment.
For more about Message, visit the Message section in Sequence Diagram.